

I’m often asked how I get my gear photos. People like showing off their gear and as a result, camera photos have become more popular.
There is obviously a lot of work (and gear) that goes into good stock camera photos, but there are also ways to produce good photos on an extremely low budget. When I say extremely low budget, I mean under $10 assuming you have the camera and lens to take the photo and another piece of gear you want to photograph.
The method I’ll demonstrate as part of this article isn’t the best way to do it, but it is quick and easy way to get started along with improving the quality of your photos. This is the method I first started with and it’s cost effective way of experimenting, while still getting very good results.
Required gear
To take these photos you will need at a minimum
- A camera (to take the photos with)
- A lens
- A piece of camera equipment, for purposes of this article we will use a lens
- A piece of black or dark grey cardboard – preferably at least A2 size. It’s important that the cardboard is matt and non reflective.
- A reflector or a piece of white cardboard, or a speedlight.
If you don’t have a speedlight, you will need some good natural light coming through a window with a table that you can put near the window. There should not be direct sunlight falling onto the table.
If you purchase some cardboard, I would highly recommend buying 3-5 pieces as the cardboard does gets marked easily so you will have to replace them every couple of weeks if you are doing photos regularly.
The setups
Put the item on a piece of black/dark grey cardboard with a speedlight pointed at the ceiling and take the photo.

Before you start
If there is one bit of advice I can give you before you start, it’s to clean whatever it is you are photographing. This type of setup will accentuate any dust so removing the dust in advance will limit the amount of processing required.
Camera settings
Camera settings are going to be dependent on a couple of factors:
- Amount of light available or the amount of flash power – if you’re using natural light
- Type of lens
- Focal length
Whilst it is possible to shoot in automatic modes for this, I would highly recommend you switch to manual. There are a couple of reasons for this:
- Your camera will want to meter the photo brighter than it should be due to the black background and you want to be in control of this
- Your camera will change metering based on the angle you are taking the photo from because it is metering from a reflective perspective (the light bouncing back which chanegs based on the angle). This means all your photos will have different exposures which is bad if you want them to look the same for a single set of photos.
Make sure the photo is not exposed too brightly. It does need to be darker
Natural light
If you are using natural light, start with the following:
- Camera in manual mode
- 1/125 shutter
- f/5.6
- ISO100
If it’s too dark, try reduce the shutter to the same as the focal length of the camera. 60mm=1/60 shutter as a minimum. If that doesn’t work, lift the ISO to a maximum of about 1/1600. If you can’t get lower ISO than that, you probably need more natural light.
If it’s too light, change the aperture to f/8, then progressively make it smaller (bigger numbers).
Speedlight/Flash
If you are using a speedlight, you will need to work in a room with a low white ceiling of maximum 3-4 meters (9-12 foot) in height and start with the following settings:
- 1/125 shutter
- f/8
- ISO100 (ensure its not set to auto ISO)
- Speedlight in manual mode at 1/4 power
If it’s too dark, try increase the flash power until you get to 1:1. If that doesn’t get it bright enough, lift the ISO to a maximum of about 1/800. As a last resort, try change the aperture to f/5.6.
If it’s too light, change the flash to 1/8, then 1/16 until it gets to an acceptable level. If it doesn’t get darker, check your ISO isn’t set to auto ISO.
Note: Some of the smaller speedlights do not have much power. It’s worth starting at 1:1 power if you are using something like a Godox TT350.
Post processing
Important note:
When it comes to post processing multiple photos, consistency is critical. If you intend posting them into a single article, you need to ensure they look the same. They can vary from article to article, but they have to look the same in that single article or it will be immediately apparent to the viewer.
To help ensure consistency with this process, I would recommend you post process a single photo (in Lightroom/Capture One initially without photoshop) and copy these settings to the rest of your photos so the post processing, white balance and lighting is consistent with all of them.
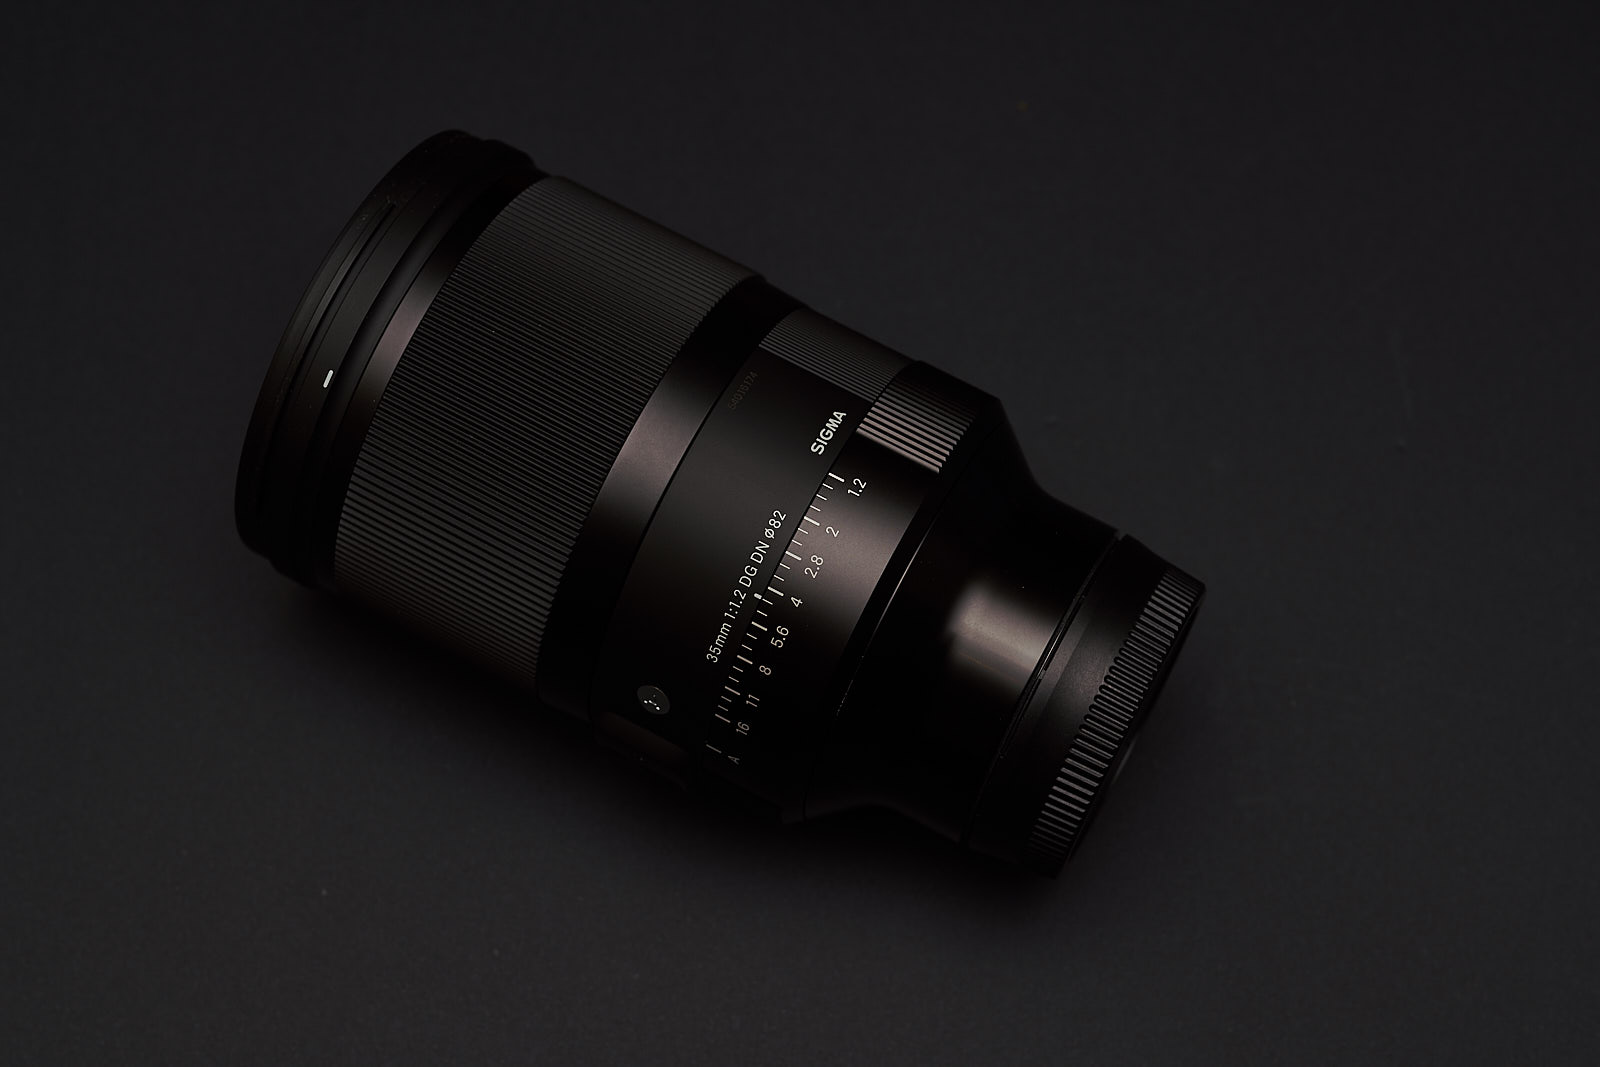
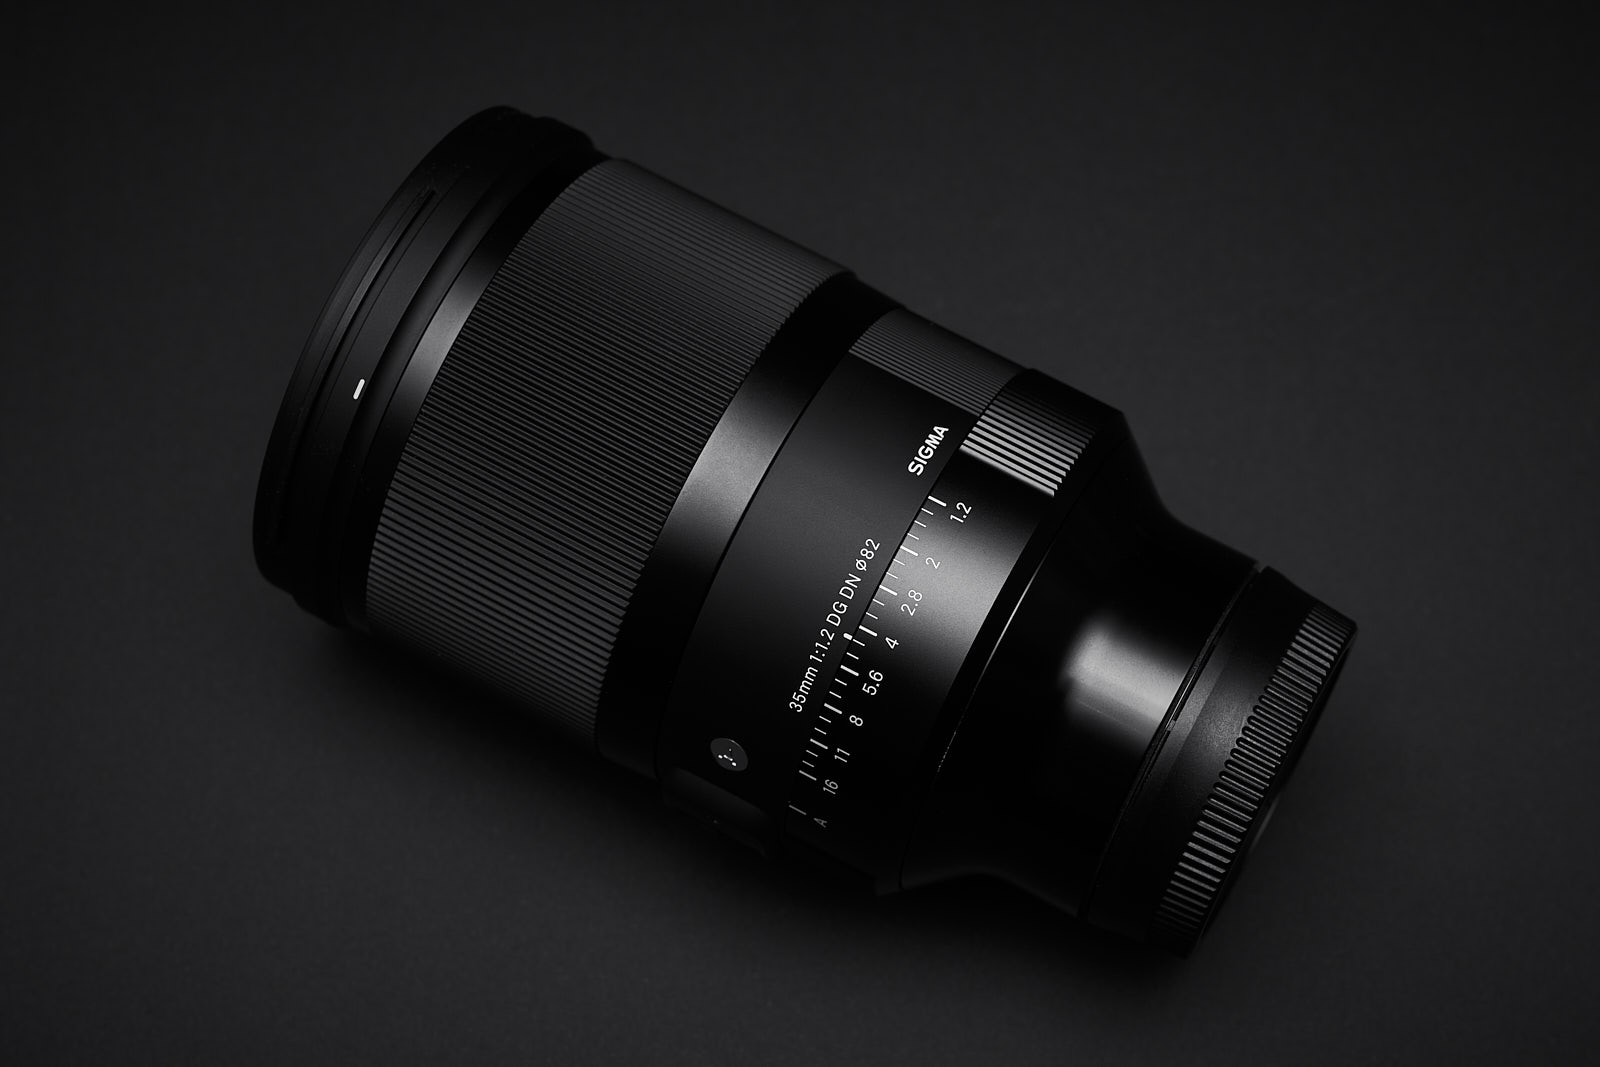
Here is our vanilla photo, nothing applied

Get the white balance right
The first thing I normally do is get the white balance right. With black or dark grey cardboard, that becomes easy. Just put the white balance dropper on the background at a point that looks a little lighter and you’re good to go.
In this case, because I used flash the white balance didn’t make a huge difference.
Crop
The next thing I like to focus on is the crop. Getting the crop right is important before you start doing the contrast and exposure. Cropping is something you learn over time, but for the purposes of this, we’re just working with a basic centre style crop.

Exposure, Contrast, etc
I tend to start with exposure first. Often you end up doing small changes to the exposure. Its hard to give fixed values, it all depends on what kind of look you want, but the one warning I would give is to avoid lifting the exposure too high.
Don’t use the auto option because this will lift the exposure too much. This is what an auto-exposure would look like with that photo.

It needs to be about a stop and a half a stop under exposed or under what the camera thinks is the correct exposure.
I also try to lift the highlights to make the whites, in particular the writing on the lens stand out a little.
I might desaturate in some cases to remove any colour elements outside of the colours specific to the lens. I.e. if it has an orange band, I will desaturate the black lens to remove any colour cast from the ambient lighting and increase the saturation of the orange band to make it stand out.
In this case I haven’t had to do anything except desaturate. With the white balance there was a still a slightly orange cast from the ambient lighting.

Remove any dust or distractions
At this point I will zoom in to 100% and remove any dust specs from the lens or marks on the background that still exist. This can normally be done in Lightroom or Capture one, but I do prefer doing this in Photoshop due to the enhanced capability for larger items.
This shows some of the dust in the photo that should be removed. Not everything has to be removed, it really depends on the size it will be posted on the web.

You can now see how most of the more noticeable items have been removed. You’ll also notice that the way I have cropped the image to show the lack of dust could also make a suitable image crop for a final image.
That wasn’t the intended purpose, but sometimes you will notice things as you zoom in so make sure you look for these hidden compositions. You learn to compose for them in future but initially they will appear by accident.

Vignette
The final step is to add the vignette. This is one area where having a bit of vignette can help the images but it does depend on the image. If I took the closeup crop above, I wouldn’t typically add vignette. If I took the bigger image view that shows the black paper, I would.
Conclusion
That’s the final image. It took about 2 minutes to photograph and about 5 minutes to post process with the spot removal. Initially it will take longer but eventually you can create this images fairly quickly. The most time consuming part is typically finding the right composition to fit the item in question.

Great info and thank you! 🙏
LikeLiked by 1 person
Very cool article mate. This is exactly how you taught me to do product shots.
LikeLiked by 1 person
Wonderful writeup. Thank you for sharing knowledge.
LikeLike